Sunday, March 04, 2007

ISC art pics

Sorry I have not been sharing much lately.. have been in bed with a viscous sinus/ear/throat infection that is determined to stay with me. Been three weeks now! argH!!!! Finally getting a bit better..keeping my fingers crossed that it will end completely soon.
Sooo...
Here are some art samples I did for Innovative Stamp Creations that i have not been able to share before now. These are some Stampboards ( get them at stampscapes.com) that I used dye ink for color and then stamped images from I.S.C. in permanent black ink. The idea then is to scratch through the color using a pointy metal tool so that the underlying color ( white) shows through. I LOVE playing with these!


The next 2 pictures are of ATC's made with a plastic film from Zsiage that are cut into ATC size. These take alcohol inks wonderfully and you can stamp or glue right onto them as well. I cut a hole in the second one, colored it with alcohol inks and then layered it onto a piece of cardstock that was colored to match with stamped images on it. The idea was for the images to show through the plastic overlay. It looks much better in person.


This is a normal cardstock ATC that uses Distress inks and images from I.S.C.

These next 2 ATC's are made from 2 pieces of heavy vinyl that you get from fabric stores. I stamped the image onto the front of one of the vinyl pieces. I then colored the back of that piece with alcohol inks and let it dry. To get the colors and images to show up ( since the vinyl is clear) I covered the alcohol ink side with Brilliance White pigment ink and set it aside to dry. Layer the other piece of vinyl over the colored/stamped one and use copper tape around the edges to seal them together. To embellish the Father ATC I stamped the same image onto a piece of colored cardstock and punched out the letters with a regular sized hole punch, glued them onto the front of the ATC and used Glossy Accents to give them a clear button effect.

For the quote in this one I printed it out and cut to size. Layer the words onto a darker cardstock and trim close so that you have a thin border of color around each word. Glue them onto the stamped/inked vinyl piece then layer the plain piece of vinyl over the top, sandwiching the words in between. Do the same thing for the clip art picture of the little girl.

This is an ATC box that you can purchase from Innovative Stamp Creations. It comes in plain white so that you can color/ink/stamp to your hearts desire. For this one I covered it with a way cool piece of scrapping paper. The letters are actually plain white letter stickers that i colored with inks and stamped onto to make them arty. I used a sheet of scrapping words from I.S.C. to stamp all over the box with Distress inks. This is the back of the box.

This is the front of the box.

The last one for now is a card made with I.S.C. images and Distress inks. The main flower image is actually a 2'x2" stampboard colored with Distress inks and stamped with permanent ink which was glued into the center of a pink cardstock panel.Will share more later...hopefully tomorrow! Please LMK what you think..I love feedback!

Labels: , , ,

Sunday, February 25, 2007

Class Schedule for March

Here is the list of classes that I will be teaching at ACMoore in Asheville, NC. for the month of March.Friday March 9th, 2007..........6-8 pm.......Faux Wood Cane in Polymer Clay.....$25.00
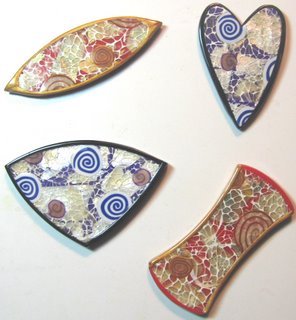
Must bring a basic tool kit to class: Pasta/clay machine, acrylic roller, clay blade and tile to work on. All other supplies will be provided. We will learn how to make a faux wood cane in polymer clay ( round cane as well as a straight one like the one used in the samples above). We will then make a small plaque similar to the samples shown here.


Friday March 16th,2007......6-8 pm .... Mosaic Cane in Polymer Clay .....$25.00
Must bring a basic tool kit to class: Pasta/Clay machine, acrylic roller , clay blade and tile to work on. All other supplies will be provided. We will be making a mosaic cane from polymer clay and you can choose either bright or earth tones, as well as make something from the cane like beads or a pin.


Friday March 23rd,2007...6-8 pm...Ripple Cane Effect in polymer Clay...$25.00
Must bring a basic tool kit to class : Pasta/clay machine, acrylic roller, clay blade and tile to work on.We will be making a cane and then using a wave or ripple blade to cut into it to get a ripple effect. I will have the wave/ripple blades for you to use for this if you do not own one. We will make earrings from the cane.

Friday March 30th, 2007.....6-8 pm ......Fire Polish and Seed bead bracelet...$25.00
All supplies will be provided for this class. We will be making a bracelet using an off loom weaving technique (with beading needles and thread) with Fire Polish beads and Seed beads. There will be two choices of colors.

There is a limit of 8 people in class at this store, so please sign up early to ensure a seat.
Email me if you have any questions about my classes or teaching. ...
goatmom1@charter.net

Thursday, February 15, 2007

Polymer Clay postcard

This is a postcard made entirely from polymer clay for a swap we did in our local clay guild ( Blue Ridge Polymer Clay Guild in Asheville, NC) . The background is a skinner blend of orange and magenta clays...it is hard to see the colors in the picture. I then stamped a script background with red perm. ink and stamped the main image with black perm ink.I used a purple perm ink to sponge through the punchinella. The hearts are from a spiral cane i made with translucent and purple clay. Once the card was baked the punchinella kinda got lost, so I went back over it with Versamark ink and an irridescent mica powder. The words are printed on copy paper, inked for color and glued into place. The whole thing was then sealed with Polyacrylic water based sealer. I hope Barbara liked it!! :o)

Wednesday, February 07, 2007

More Clay goodies...

This button is made with small pieces of black clay that were torn and applied to scrap clay. once it was cured I then painted it with light grey acrylic paint and rubbed off the excess to give it a slate look.
I love making cabachons because I love to bead them lol. I had a neat looking stack of Makume Gane clay leftover from the button I made so I simply molded it into a cab shape and baked it. I think will buff it up so it has a nice sheen to it instead of sealing it as it would be all shiny. I like hte look of the matte clay on this one.
I have a cool stamp of small Geisha faces in squares ( 9 in all on the stamp) that I thought would be fun to make pins from so I took slices from a wood grain polymer clay cane I had made and pressed them into the stamps. After they were cured I painted them with brown acrylic paint which really made the images pop out. Going to add other things to them to make them into pins.(Will share the pics of them when I do) BTW, the stamp is from Stamp Magick.

And last but not least for today, I wanna share my box-o-beads that made this week. These are the result of one night's playtime. I used canes I made to decorate them with and tried to make sets of at least 4 each. Will share pics of the finished bracelets that I am going to make with them so you can see the designs better. Thanks to Donna Kato as she has beads on her site that got me inspired to make these!Love hers and if you haven't been to her site do so!

Labels: ,

More clay buttons...

These buttons were made with scrap clay and stamped with Asian images. Once they were cured I painted them with Micaceous Iron Oxide paint from Golden and then when they were dry I rubbed on three colors of Perfect Pearls mica powders. This gives the ma Raku look. The pictures do not do them justice as in person they are rather sparkely.
Here is another button that was made with the same colors in a Mokume Gane stack but the stack was distressed with a paintbrush , scallop blade and a metal scoop to get the impressions you see here. Then I cut thin shavings off the top of the distressed stack of clay and layered them onto black clay. I really like this one.

More polymer clay Buttons..

This one is approx. 1" long and was made from golden yellow clay. The impressions are ginko leaves. I painted the button with Deep Burgandy acrylic paint but it was still too light for what I wanted so I used some Burnt Umber paint next mainly in the impressions. I like the color now!
This one is the same size as the one above and it was made with white clay. I crumpled a piece of copy paper and impressed the creases into the clay. Once it was cured grey paint was used to accentuate the creases.
These were made with the Mokume Gane technique that had hunter green, burgandy and gold clays. The impression used was of an Asian script. The oval button design was made with the scraps that you cut off of the original Mukame Gane stack.

Recent Art time!

The past few days i have been working on Polymer Clay goodies. A friend asked me if I would make some handmade buttons for her OOAK Knit wear...and here are some of them!
This one is approx.1" square made from black and red poly clay and gold leafing accents.

Saturday, February 03, 2007

Feb 2nd new beadies..


These brick stitched heart charms were made on Feb 2nd. These are very adictive..lol...gonna make a matte black tube bracelet to hang them from..and of course i will prolly have to make more charms ! LMk what ya think ?

Trying to create everyday...


I am late with posting this..as usual.. lol.. but I want to TRY to post a new creation for each day.
This heart beadie is a pin for the local bead society meeting next week..LMK what ya think !? This was made on Feb 1st.

Friday, January 26, 2007

Pictures of class samples...

Translucent Clay Cane Pins - Feb 23rd $25.00 Bring your trans. canes to class

Pictures of class samples...

Polymer Clay Goddess - Feb 17th $40.00 ( this is not my own design..from the book by Nanetta Bananto....tho in class we will be adding our own colors/cane designs/ embellishments)

Pictures of class samples...

Polymer Clay Transfers - Feb 16th $25.00

Pictures of class samples...

Translucent Polymer Clay canes-- Feb 9th - $25.00

Pictures of class samples...

Right Angle Weave Bracelet class - Feb 2nd---$25.00

Teaching Schedule for Feb. 2007

Hi all... here is the schedule for the classes I am teaching in Feb. at the ACMoore in Asheville, NC.
If you have any questions regarding my classes or would like to me teach in your area, please email me !! goatmom1@charter.net
Friday Feb.2nd---- Right Angle Weave Pearl bracelet---6-8PM...$25.00 ( supplies included)
Friday Feb 9th-----Translucent Polymer Clay Canes -----6-8 PM..$25.00 ( supplies included)**
Friday Feb 16th--- Polymer Clay Transfers------------------6-8 PM..$25.00 (supplies included)**
Saturday Feb 17th--Polymer Clay Goddess ---------------3-6 PM...$40.00 (supplies included)**
Friday Feb 23rd-----Transulcent Cane Pins/pens--------6-8 PM....$25.00 (supplies included)****
** Please bring tools to class (pasta/clay machine, acrylic roller, clay blades, tile to work on)
****Please bring the translucent cane(s) we made in the Feb. 9th class and any other canes you have made.

Hope to see some of you in class !

Monday, December 18, 2006

Beading


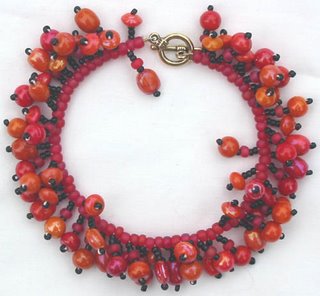
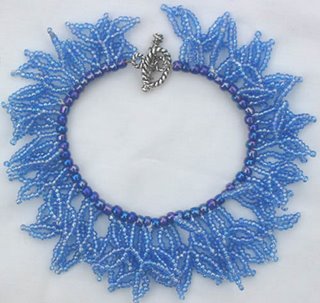
These are some simple beaded pieces I have made and sold. The bracelets are what I call Cha Cha Bracelets and the beaded goddess pin is one i made for teaching classes here in NC.